How to install a rear-wheel e-bike conversion kit
Fitting a Cyclotricity Rear-Drive 1000W kit follows the same flow as the front kit, but the motor goes in your rear wheel and takes a screw-on freewheel for your gears. Because it's a high-torque motor, fit a torque arm where your frame needs one (aluminium, carbon or degraded-steel frames, filed dropouts, or shallow dropouts). Budget about two hours. The 1000W kit is powerful and intended for off-road use; it ships restricted to road-legal speed and can be de-restricted via the LCD display for off-road riding.
Tools you'll need
- Adjustable wrench
- Set of Allen keys
- Flat and crosshead screwdrivers
- Grease / lubricant
- Zip ties
- Tyre pump
- Freewheel remover tool (to transfer an existing freewheel)
What's supplied
- Cyclotricity Rear-Drive 1000W kit (motor pre-laced into your wheel)
- Freewheel — transfer your own, or add a compatible one to your order
- Torque arm — fit where the frame requires it (not needed on every bike)
- 48V battery, controller box/bag, LCD display
- 1
Bench-test the kit before you fit anything
As with the front kit, wire it all up first: motor and system cables to the controller, then throttle (yellow), e-brakes (red), the LCD display (green), and the 48V battery. Align any arrowed connectors and push them home, switch on and tap the throttle briefly to confirm the motor responds. Then disconnect ready to mount.
- 2
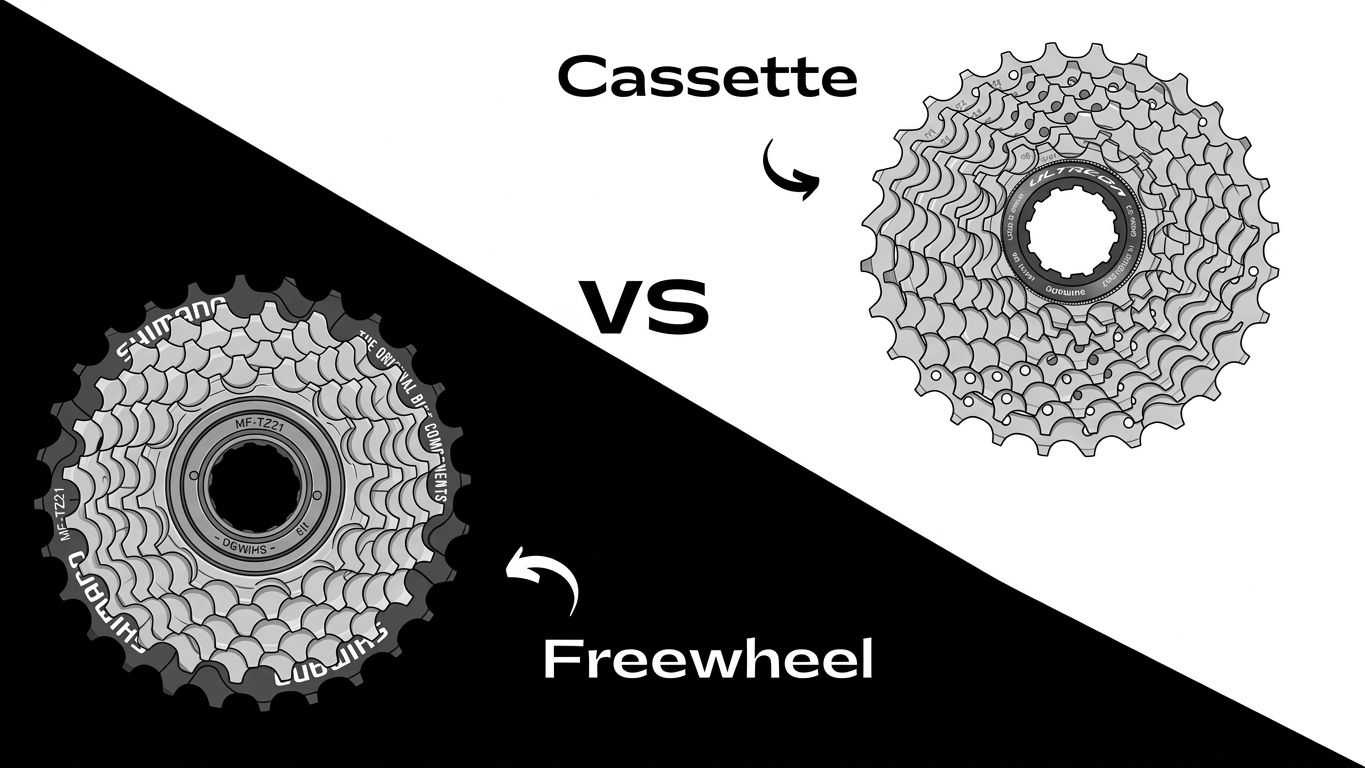
Check rear spacing, slot depth and gears

The dropout slot must be 10mm wide (9mm steel can be filed; never carbon/aluminium) with standard 135mm spacing. The manual's ideal dropout depth is 14mm — if the axle spindle sticks proud, you must fit a torque arm. Check whether your bike runs a freewheel (screw-on, compatible) or a cassette (you'll need a separate freewheel). Wheel sizes covered: 27.5" and 700c/28"/29er.
- 3
Remove your rear wheel and tyre
Flip the bike onto its saddle and bars, shift to the smallest sprocket, release the brake and remove the rear wheel. Transfer your tyre, tube, rim tape (and disc rotor, if fitted) onto the motor wheel.
- 4
Prepare and fit the freewheel
The rear hub only takes a freewheel (threaded cogs). Remove your existing freewheel with a freewheel-remover tool to reuse it, or hand-fit the new one you bought. Clean and grease the threads first, then thread the freewheel on — pedalling pressure self-tightens it.
- 5
Sort freewheel alignment and spacers
The motor spindle's flange must not sit below the freewheel edge — if it does (common with 8+ cog freewheels or a rear spacer), "pancake" the supplied washers onto the flange until they clear it, so the dropouts can't rub the freewheel. If your derailleur later rubs the motor on the biggest cogs, add spacers behind the freewheel by trial and error until it shifts cleanly. Spacers aren't included, so start without one.
- 6
Fit the motor wheel and torque washer
Guide the chain onto the freewheel and drop the axle into the dropouts with the motor cable correctly oriented. Seat the torque washer's flange into the dropout from the inside, then fit the washers and nuts and tighten firmly.
- 7
Fit a torque arm if your frame needs one
The 1000W motor makes serious torque, so a torque arm protects weaker dropouts. It is not supplied by default because not every bike needs one — but fit one if your frame is aluminium, carbon or degraded steel, if you filed the dropouts, or if the dropouts aren't deep enough to swallow the spindle. Secure its tab to the chainstay so it braces against motor torque. Never run a high-power rear hub on a frame that needs an arm without one.
- 8
Refit the chain and check the gears
Put the chain back over the freewheel and derailleur. With the bike still upside down, spin the pedals by hand, shift through the gears and adjust the derailleur so it reaches every cog without touching the motor (add/adjust spacers if it rubs). Re-check and adjust the brakes.
- 9
Fit the PAS sensor (optional)
Fit the pedal-assist sensor to the square-taper bottom-bracket spindle and mount the pickup on the down/seat-tube — see the PAS fitting guide. Skip this step if you'll ride on the throttle.
- 10
Mount the 48V battery and controller
Bolt the 48V battery holder to the down-tube bosses and slide the battery in. The 1000W controller is larger and may not fit the plastic box, so it often comes with a Velcro bag to mount on the frame — keep the battery bullet connectors inside the housing.
- 11
Fit the controls and connect the cabling
Fit the throttle, e-brakes (optional; not for integrated-shifter or hydraulic levers) and the LCD display on the bars. Reconnect the colour-coded loom (yellow/red/green), route it along the frame and zip-tie it clear of the gear and brake cables.
- 12
Test, then set speed and wheel size on the LCD
Switch on, lift the rear wheel and tap the throttle to confirm the motor spins; pedal to check PAS. In the LCD's user setup, set your maximum speed, wheel diameter and units so readings are accurate. The kit is road-restricted out of the box; the LCD is also how you de-restrict it for off-road use only (genuine de-restriction needs Cyclotricity's codes after signing the disclaimer). Re-check the torque arm and axle nuts after your first ride.